Call it a compilation of all the crazy projects I've come up with over the years. Call it a how-to for things around the house. Call it whatever you like :) It's what I do everyday. My blog is really just a way for me to share what I've learned over the years about home improvement, interior design, organization, diy, crafting and home repair. And most importantly it comes from always working on a budget and forever wanting to fend for myself when it comes to anything. I hope you enjoy (and learn a few things along the way :)

Tuesday, April 17, 2012

Hair dryer storage project complete

Whoever doesn't think Pinterest is the best website ever invented doesn't get on it!

Now that I have that off of my chest :), here is my "saw it on Pinterest and did it" project for the day.  The hair dryer storage using a magazine file.


So this is the best idea I think I've seen (did I say that before ; )


You buy a cheap magazine file (or use one you have).  These two are from Ikea, both from the as is section for $3 each (but they have a lot of options for cheap regular price ones).  I wouldn't use the strong paper ones for obvious reasons (wet area and cardboard don't mix :).  Their metal and plastic ones are mostly 2 for $7.  I personally prefer the mesh one, but my older daugther didn't want to be able to see through it, so to each their own ; )

Just screw it onto your cabinet door (use three screws that are short enough that they won't go through your cabinet door, two on top and one on bottom) and set the hairdryer in.  It couldn't have taken me more than 5 minutes to do both.

For the mesh one, it was easier (holes were already in it.  For the solid metal one, I used a nail to "predrill" the holes : ) 


I placed two screws on either side of the top just inside for both.

I also found that you need to secure the bottom as well to make sure it doesn't move around too much.  I used the hole on the spine to place one more screw on the bottom of each.  This was hard to photograph, but here's the bottom screw on the solid one.


And here it is on the mesh one.  This access hole on this one isn't very big, but it was still easy to secure the screw.


Again, don't use screws that are too long and ruin the front of your cabinet.  Also, if your cabinet is "raised panel"  make sure you are placing the screws in the right places (where you have the thickest part of the cabinet).

This is a must do if you own a hairdryer so get on it : )

Sunday, April 15, 2012

Make a drawer out of your unused keyboard tray

If you have a keyboard tray you don't use on your desk (i.e., you have a laptop), turn it into a drawer with a drawer organizer.


This one we got at Ikea and used double sided tape to stick it down.

Just measure height width and depth so you get the right size (measure the depth with the keyboard tray open so it doesn't go back too far to be able to access the back bin)s.


$2.49 later my daughter has better places to store pencils, pens, etc.  Even looks good with the drawer closed since it matches the desk.  You could easily add a trim piece if yours didn't.

Quick, cheap and easy fix. 

Here's the before shot : )

Friday, April 13, 2012

Duct tape frame

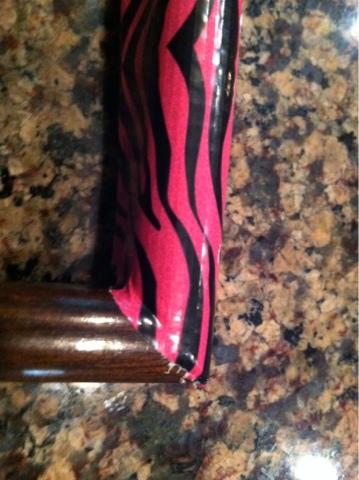
I warned you that there would be several duct tape posts after my daughter's birthday :) And here's another. A duct tape picture frame...pretty simple actually.


Took an old frame I had in a drawer (really cheap dollar store type).  I cut duct tape strips the length of the left and right sides (with about and extra 1/4") and adhered it to the outside.


I made sure it was covering the corner just slightly ( to insure a good looking corner joint...no gaps). I then wrapped it toward the inside.


In order to get it to go around the inside corner, I just trimmed each side at a 45 degree angle once it was at that point.


As you can see the right and left side didn't have to be perfect since the top and bottom pieces will cover it up. 

I repeated the process for the top and bottom piece (I had to be more careful with my cut since you would see that edge of the tape.  Turned out pretty cute and more importantly...my daughter loves it!

Thursday, April 12, 2012

Success...found all 5 favors of Crystal Light Mocktails

It took stops at two different stores, but I found them all.

The main three, Margarita, Mojito & Appletini at Walmart for $2.68 (I also picked up their Great Value brand version of margarita...I'll be doing a taste test :).

Found the Limited Edition Peach Bellini and Pomotini at Tom Thumb for $2.50 (Safeway or Randall's sister grocery store). I have such high hopes for the Peach Bellini that I got two.

My friend was at Target and said they only had the three main favors, but on sale for $2.48 and Margarita and Appletini were sold out.

Let the mixing begin. They won't be "mock" for very long :) I'll post successful recipes as I make them :)

Crystal light mocktails

Off to find all 5 of these flavors right now. Will report back as soon as I have found them and tried them. How have these been out for a year and I've never heard of them???


(I'll report back on which girl I feel most like after drinking each one : )  Marketers are so funny...and yes I used to be one.

Hang candle chandeliers in your bath

Or maybe they are called candeliers? Either way they make a great addition to a half bath or WC.


It's often hard to warm up a small bathroom when there is little or no counter space to decorate. One solution is with a hanging candle holder. They are inexpensive and readily available now that the patio decor is out in stores.


Make sure you hang it high enough that no one will bump their head, but low enough that you can light them.


Then when you have people over, you can light the candles to make the bath smell fresh all night (nice way of putting it :)

Faux book storage

I don't know if you've seen these before, but national geographic used to make sleeves to hold their magazines (or they still do maybe).


Well I ran across them at half price books for 25 cents in the clearance section and immediately thought, "I can use these in my study as hidden storage." You know CD-roms, computer booklets, discs, etc. I bought every one they had and put them in my study bookcases. I then went to a second location and found more for 50 cents each. Still a great deal.


You can call ahead to see if they have any vs. driving around. I see them often at resale shops and estate sales as well. Easy thing to collect over time as you spot them.


Hope this idea helps you create more storage in your home :)