Call it a compilation of all the crazy projects I've come up with over the years. Call it a how-to for things around the house. Call it whatever you like :) It's what I do everyday. My blog is really just a way for me to share what I've learned over the years about home improvement, interior design, organization, diy, crafting and home repair. And most importantly it comes from always working on a budget and forever wanting to fend for myself when it comes to anything. I hope you enjoy (and learn a few things along the way :)

Monday, February 11, 2013

How to repair frayed corners on a Vera Bradley bag

My daughters just inherited a Vera Bradley backpack from their cousin. Do they need another VB bag of any kind? No. Do they want it? Yes. : ) I noticed the corners were frayed and the plastic inside the edge binding was showing. Of course, being the project fanatic that I am, it was time for me to figure out how to fix it : )


It was actually very simple and I am by no means a seamstress. Do I know how to use a sewing machine? Yes. Do I have anything more than one needle and one presser foot? No. So this is beginner stuff.

I decided I would simply re-round the corners to get the frayed edges inside of a seam. First I decided to cut off the plastic edging. It wouldn't be necessary once the corners were inside the corner seam, and they would just get in the way when I was sewing.  Here is what it looked like after I cut the plastic off

 
Second, I turned the bag inside out (as I would be sewing from the inside). I then took pins and marked where the fraying started and stopped on each corner.

 
 I transferred those points onto the inside fabric with pencil (this is hard to see from the pic, but its on the white part).  This helped me remember what points needed to be included in the seam.
 
 
I then sewed each corner in. I started and stopped sewing about a 1/2" outside of each pencil mark. For those of you who don't know how to sew at all, you start your seam off the fabric, go in and them come back off the fabric at the end. In this case I didn't go all the way off over the edge binding.  I just went off the brown fabric onto the edging and stopped. I went in about 1/2" from the original seam by the time I was in the middle (remember your seam is progressive from edge to edge, starting off the fabric...building to 1/2" in from the original seam by the time you get to the middle...then gradually going back off the fabric). These notes are for beginning sewers obviously. Hopefully the picture shows what I am referring to. Its really hard to see eventhough I used white thread. 

 
Once I sewed all four corners, it was like a new bag. These two pics show two corners after they were sewn.  In the second one you can see where the edge binding is showing on each side, but sewn in at the middle.


There was some fraying on the bottom of the backpack straps as well, but I decided to leave that alone.  I wasn't about to cut the straps off and resew them back on further down. I also didn't was to tear open the bag to accomplish a reattachment properly  More experienced sewers might be willing to, but I'm more inclinded to wrap them with a solid fabric to hide them.  That's for another day : )  Just wanted to fix the obvious beaten corners. 
 
Hope this gives you the courage to try this quick fix : )

Friday, February 8, 2013

The best way to revive wood cabinets and furniture!

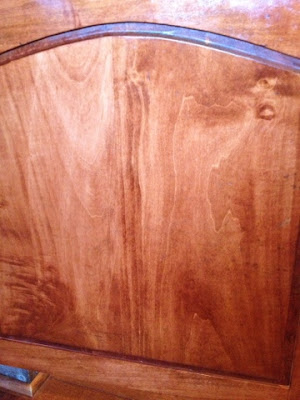
As I was completing one of my projects today, I realized there may be people with wood cabinets or furniture who have never heard of Old English Scratch Cover. This is hands down the best way to breathe new life into your wood cabinets or furniture once they start to show the signs of everyday life (scratches and dings from vacuuming, silverware, accidental bumps, etc.)

I thought I would show the inside if my pots and pans cabinet doors as an example (since its quite banged up).

Before:

 
After:

 
And all it takes is a rag and a little wiping.

Here is what the bottle looks like (with the lid off and my rag sitting on it :). I use the one for Dark Wood because that's what I need. There might be one for light wood, too.

 
I'm currently wiping every cabinet and piece of furniture in my house with this. It's going to take a while, but it will be well worth the before and after. Definitely something I would do if I was about to put my house on the market, too. Makes everything look shiny and new :)

 
You can find Old English Scratch Cover for dark wood at most local stores (target, walmart, etc.)  Here is a link to Amazon if you want it shipped to.  It looks like because it is small and inexpensive you have to buy $25 worth of stuff from amazon to get it shipped to you for free (FYI).


This is a must purchase for homeowners with wood furniture :)

Thursday, February 7, 2013

Breath new life into your old sofa...add more stuffing!

So I've been out and about lately looking to replace my sofa and loveseat in my living room. I've had them over 12 years and they've served me well.


Now as everyone knows, I'm a bargain hunter. I hit all my local haunts looking for a good deal on something I actually liked, but I was striking out. Either I didn't like the fabric, the size, the style or the price. I also ran the risk of getting something that I might end up hating, didn't look good in my room, didn't fit or doesn't wear well. I keep furniture a LONG time, so that initial purchase always scares me. I lucked out last time and got a steal of a deal on a style I loved then and still adore, and the frame and fabric has held up. It was just the back cushions that were lacking.

After a few days of hitting stores close by while I was running other errands, I realized I wasn't going to find a good deal on what I wanted right now.

So, back home to my sagging cushions. Later that night I sat on my loveseat, and began watching HGTV. On one of the shows they said "most couch cushions have zippers so you can remove the covers to wash them". I thought, yeah if your cushions come off...my back cushions are attached. I placed my hand under the back cushion and voila there is a zipper! Oh my goodness, I can add stuffing to my back cushions even though they are permanently attached! I had no idea!

 
So the next day began the transformation of my sofa!

I am a self proclaimed hoarder of materials and supplies. Before I throw anything away I will rip it apart for parts for future possible uses. Ever since I have lived on my own I have removed the stuffing from old pillows I am replacing and kept it. I've used it to make European pillows, pillows for pillow shams, decorative pillows for my girls rooms, etc. Because of that I had tons of stuffing to use to help fill my cushions.

It was quite easy actually. First, remove any cushions you can and vacuum :). Mine was in desperate need of that :)

Second, unzip the cushion you want to revive and remove the form inside (mine was a covered pillow filled with poly fill and not completely re-sewn shut...you'll have to split your pillow cover open a little it yours isn't).


Third, remove any extra stuffing that might be up in the cushion (yours may not have this, but mine did...I guess it was added after the cushion form was put in to fill any loose spots).

Fourth, re-fluff the current poly fill (if you don't have a solid foam form, you can refluff the compressed poly fill by pulling it apart handful by handful).

Fifth, add additional poly fill to fill the cushion until it is plump.

Sixth, reinsert the form into you cushion cover and attempt to rezip it :) This is a fun task on your own...i managed, but get a helper if you can :)  Here is the left pillow refilled and the right pillow not.

 
Last but not least, enjoy your new sofa that looks and feels brand new!!!! I am so happy I don't have to go furniture shopping anymore, and now I can add stuffing as it starts to look even slightly compressed (vs. waiting until it is dead like before :)


Here is the side by side before and after. So happy!

 
Have fun restuffing your sofa! It's the best arm workout you can ask for :)