Call it a compilation of all the crazy projects I've come up with over the years. Call it a how-to for things around the house. Call it whatever you like :) It's what I do everyday. My blog is really just a way for me to share what I've learned over the years about home improvement, interior design, organization, diy, crafting and home repair. And most importantly it comes from always working on a budget and forever wanting to fend for myself when it comes to anything. I hope you enjoy (and learn a few things along the way :)

Wednesday, March 21, 2012

Another refinished polished brass light fixture


This one is in my master bath.  In this case I had a lot of finishes competing, so I had to mix it up.  Since the mirror molding is a black and metallic dark brown finish and a blacker iron piece is hanging above, I decided the fixture needed to be different enough that it didn't start all looking the same.  So I painted this one with brown craft paint first. Again right on the original finish. 

This is the original fixture (before the mirror frame was added).  I did not sand or prime it (since it won't be touched) or take it down (I just taped around it and removed the light globes).  I used the stipple painting technique again so it has texture.


This is after the brown (no mirror frame up yet).


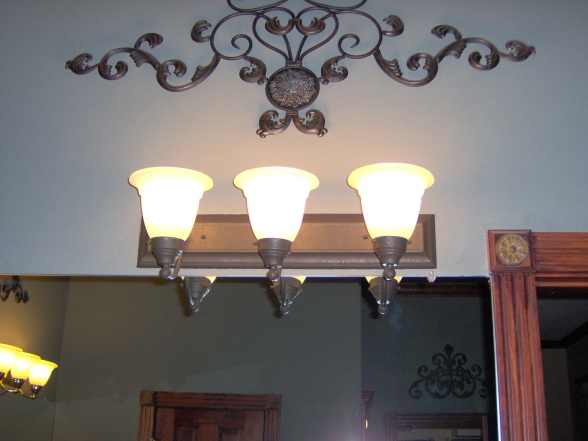
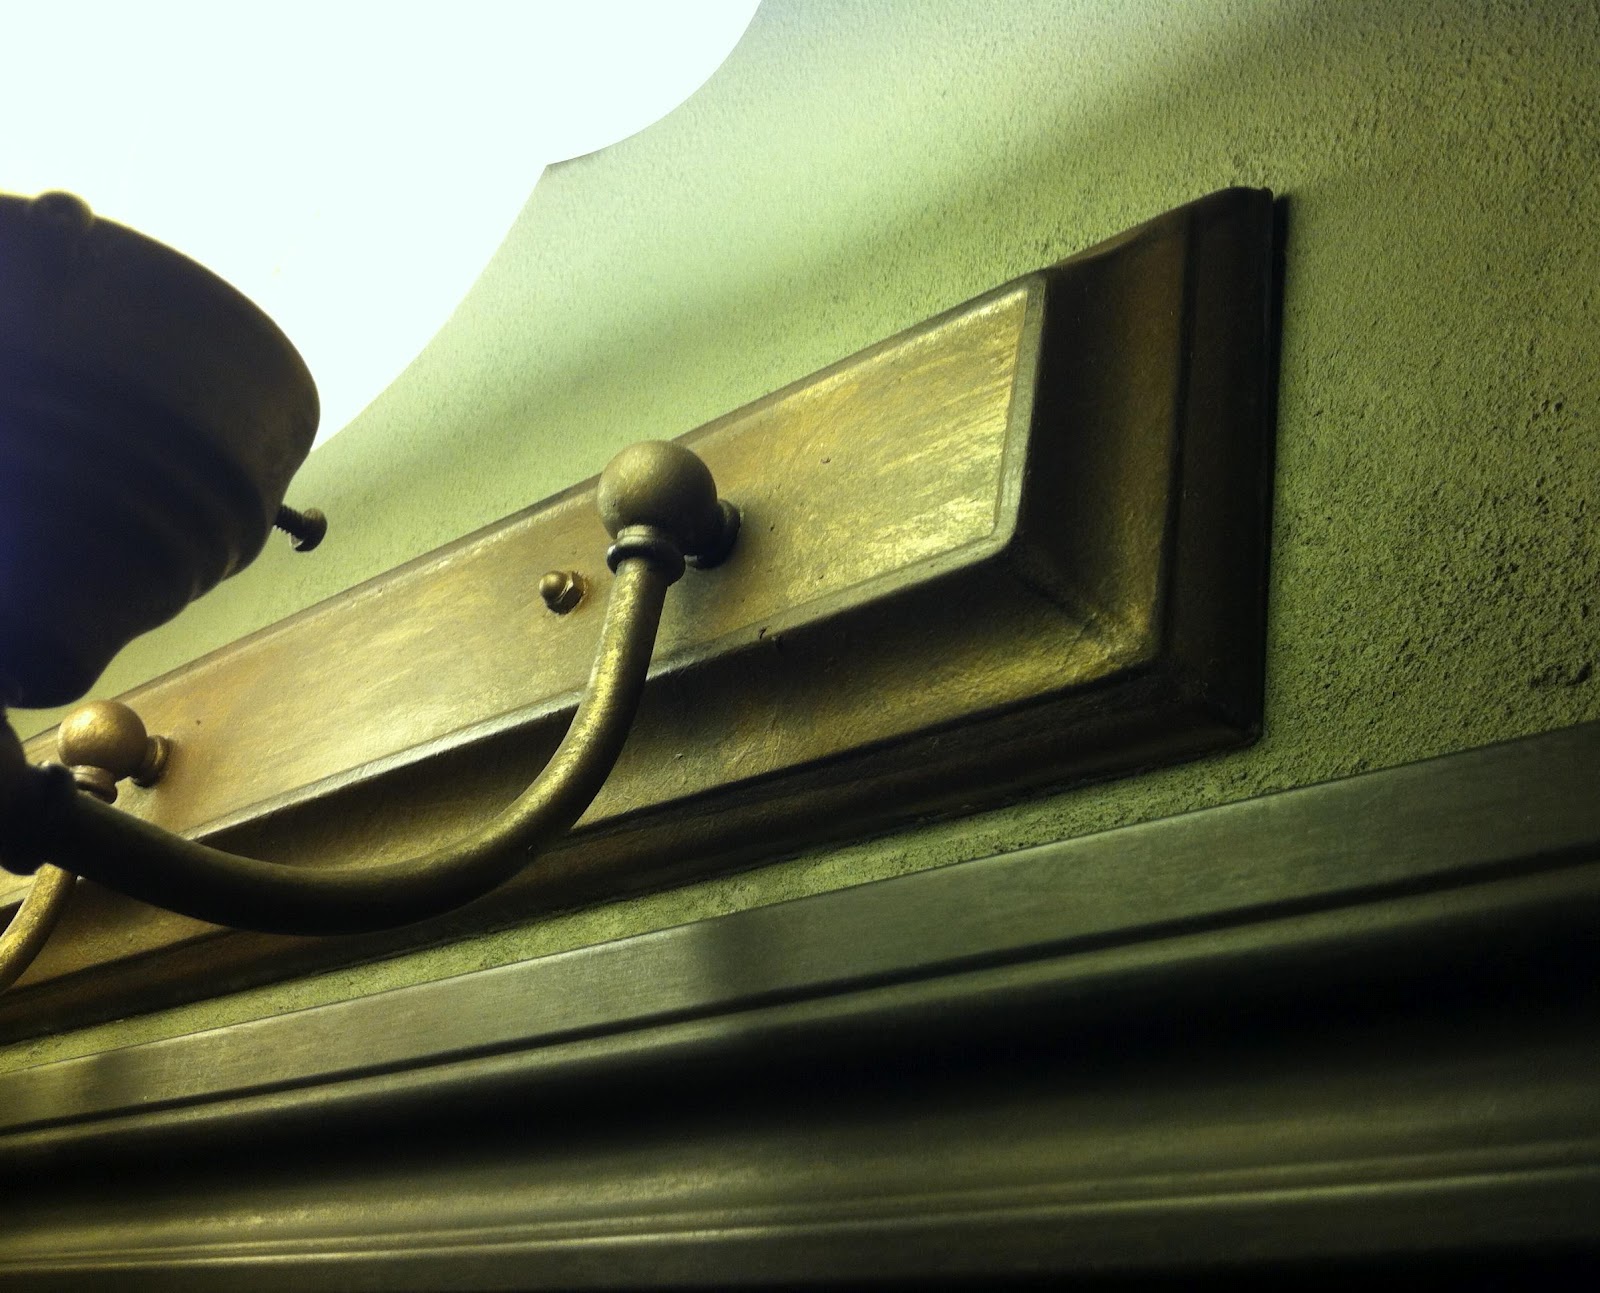
As you can see its a little flat at this point.  Then I drybrushed the whole thing with the lighter metallic bronze craft paint to give it shine and interest, then I highlighted with Modern Options Sophisticated Finishes Blackened Bronze (its darker, so it gives it more richness and helps it coordinate with the darker frame and iron piece).  Notice the frame is on the mirror now : )


Here's a close up shot of the finish.


Here's the before and after shot  (quite a difference!).


Another 7 years and counting...at least I know the finish lasts : )   Good luck painting yours!

Refinish your polished brass light fixtures

I know a lot of us still have some polished brass around our house that we would love to update.

Did you know you can easily and inexpensively paint your polished brass light fixtures to update them?


This fixture is in my half bath. The only prep work I did was tape off the outer edge of the light and remove the globes. Because you don't touch light fixtures there is no risk of ruining the finish.  My fixtures have been painted for 7 years now with no issues (is was supposed to be temporary, but I won't replace them until I find a deal :)


I stipple painted on the Modern Options Sophisticated Finishes Blackened Bronze paint (to give it texture) then I dry brushed "highlights" of an espresso metallic craft paint on some of the raised parts (the color is lighter so it gives the piece more interest and depth).

Took about 30 minutes total time and it was almost free (it uses so little of the paint that is already inexpensive). Hope this helps inspire you...happy updating!

Add His and Hers Signs above your towels in your bathroom

I will admit that I bought these and they happen to fit in the exact spot I had, but you could easily make them.  Mine have a beveled mirror layer on back, then a cream and tan scrolly pattern layer on top with HIS and HERS printed on that.


If you can't find some online that you like or will fit (etsy, ebay, etc.), you could easily create your own.  Frame HIS and HERS printed designs (find them online or easily create your own in Microsoft Paint or Photoshop). You could frame a decorative piece of paper and then stencil his and hers onto it (or use cricket letters or sticker letters).  You could even use a framed mirror for the back, then add the framed words on top.  Adds a decorative detail to a boring hook : )  Happy decorating!

Use oven cleaner to "darken" brass

If you still have shiny brass items lying around your house, you can always paint them like I have demonstrated in several of my posts, but did you know you can chemically darken them?

This piece was a bright brass planter from garden ridge.  It is real brass.


If you have any real brass that isn't lacquered, just spray it with oven cleaner and it will tarnish to a dark finish. Of course do this outside since oven cleaner fumes are bad. I leave it on and reapply as needed to get the darkness I want. If it is lacquered or polished with something preventing the oven cleaner from penetrating, you can try mineral spirits or paint thinner to break through the coating. I know steel wool will get through it, but it will scratch.

Obviously don't do this on something expensive you care about and wouldn't be willing to paint if it didn't turn out the way you want. It also won't work on fake brass. Good luck updating :)